With a great desire, you can make your own designer stool made of epoxy. These are very original elements of furniture, which is made from pieces of twigs and transparent epoxy. As legs, you can use three dried branches of the same diameter.
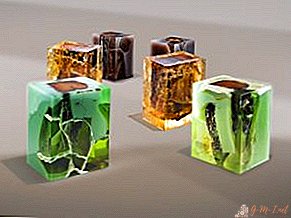
Epoxy stool
For work you will need some materials and tools:
- Dried branches of various thicknesses.
- Epoxy resin You will need 1 kg of transparent material intended for countertops.
REFERENCE. The material must be UV resistant.
- Capacity is required, for example, a plastic bucket. The diameter should be what diameter of a chair you would like to make.
- To give the product the desired color, use a special dye.
- To level the mixture you will need a plastic spatula.
- For gluing parts, prepare hot melt adhesive.
- You will also need gasoline.
Of the tools, those that most likely every home master will have will be needed. This is a grinding machine and preferably a milling cutter.
Do-it-yourself designer stool
To create designer furniture with your own hands you need:
 Cut branches into parts of the same size. If they have a different diameter, it will only be more interesting.
- Cut the bottom from the bucket. Measure out the height you need, about 5 cm, and cut a piece for a future stool. You end up with a plastic circle.
- Prepare a work surface. To do this, stick tape or oilcloth on a piece of chipboard. Put a prepared plastic circle on top and glue it to the tape along the edges, use hot melt adhesive for this. This must be done so that the structure does not move during operation.
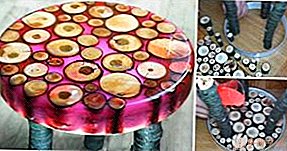
- Now you need to fix three legs from the branches into the base. Arrange randomly cut circles from branches in random order.
 Cut branches into parts of the same size. If they have a different diameter, it will only be more interesting.
REFERENCE. Try to fill all available voids to the maximum. In this case, the resin consumption will be many times less.
- Mix the material according to the instructions from the manufacturer. It is at this stage, if desired, that you can add dye.
 Gradually pour the mixture into the slots between the previously laid branches. Make sure that no voids or air bubbles form.
- Leave the material for a day to dry well.
- Next, you will need to carefully cut and remove the plastic ring.
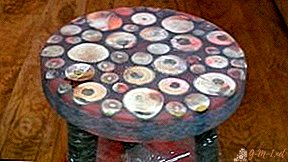
- Using a grinder, process the entire surface and round the edges using a hand milling cutter.
- Treat the surface with gasoline.
- Fill the surface with epoxy and smooth it with a thin layer with a spatula.
 Gradually pour the mixture into the slots between the previously laid branches. Make sure that no voids or air bubbles form.
REFERENCE. Do not want a chair made of twigs? It can be small toys, pebbles, everything that you may like.
Advantages and disadvantages
The working surface of epoxy resin products has several advantages, including the following:
 Superior performance. The material is highly durable and not subject to mechanical damage. During operation, cracks and chips do not form on the surface.
- Quite affordable cost. Modern manufacturers offer various materials at an affordable price, and the low cost of raw materials reduce the final cost of the product.
- Moisture resistance is one of the most significant advantages.
- Simple product care. It is not difficult to care for such surfaces.
- A variety of design solutions. Characteristics of the material allow you to create unusual and unique masterpieces that are unlike each other.
 Superior performance. The material is highly durable and not subject to mechanical damage. During operation, cracks and chips do not form on the surface.
The disadvantages include:
- Defects resulting from non-compliance with manufacturing technology.
- Material can be spoiled when processed with abrasive compounds and powders.
- High temperatures may release toxins.
IMPORTANT. Do not place hot objects on such surfaces.
Leave Your Comment